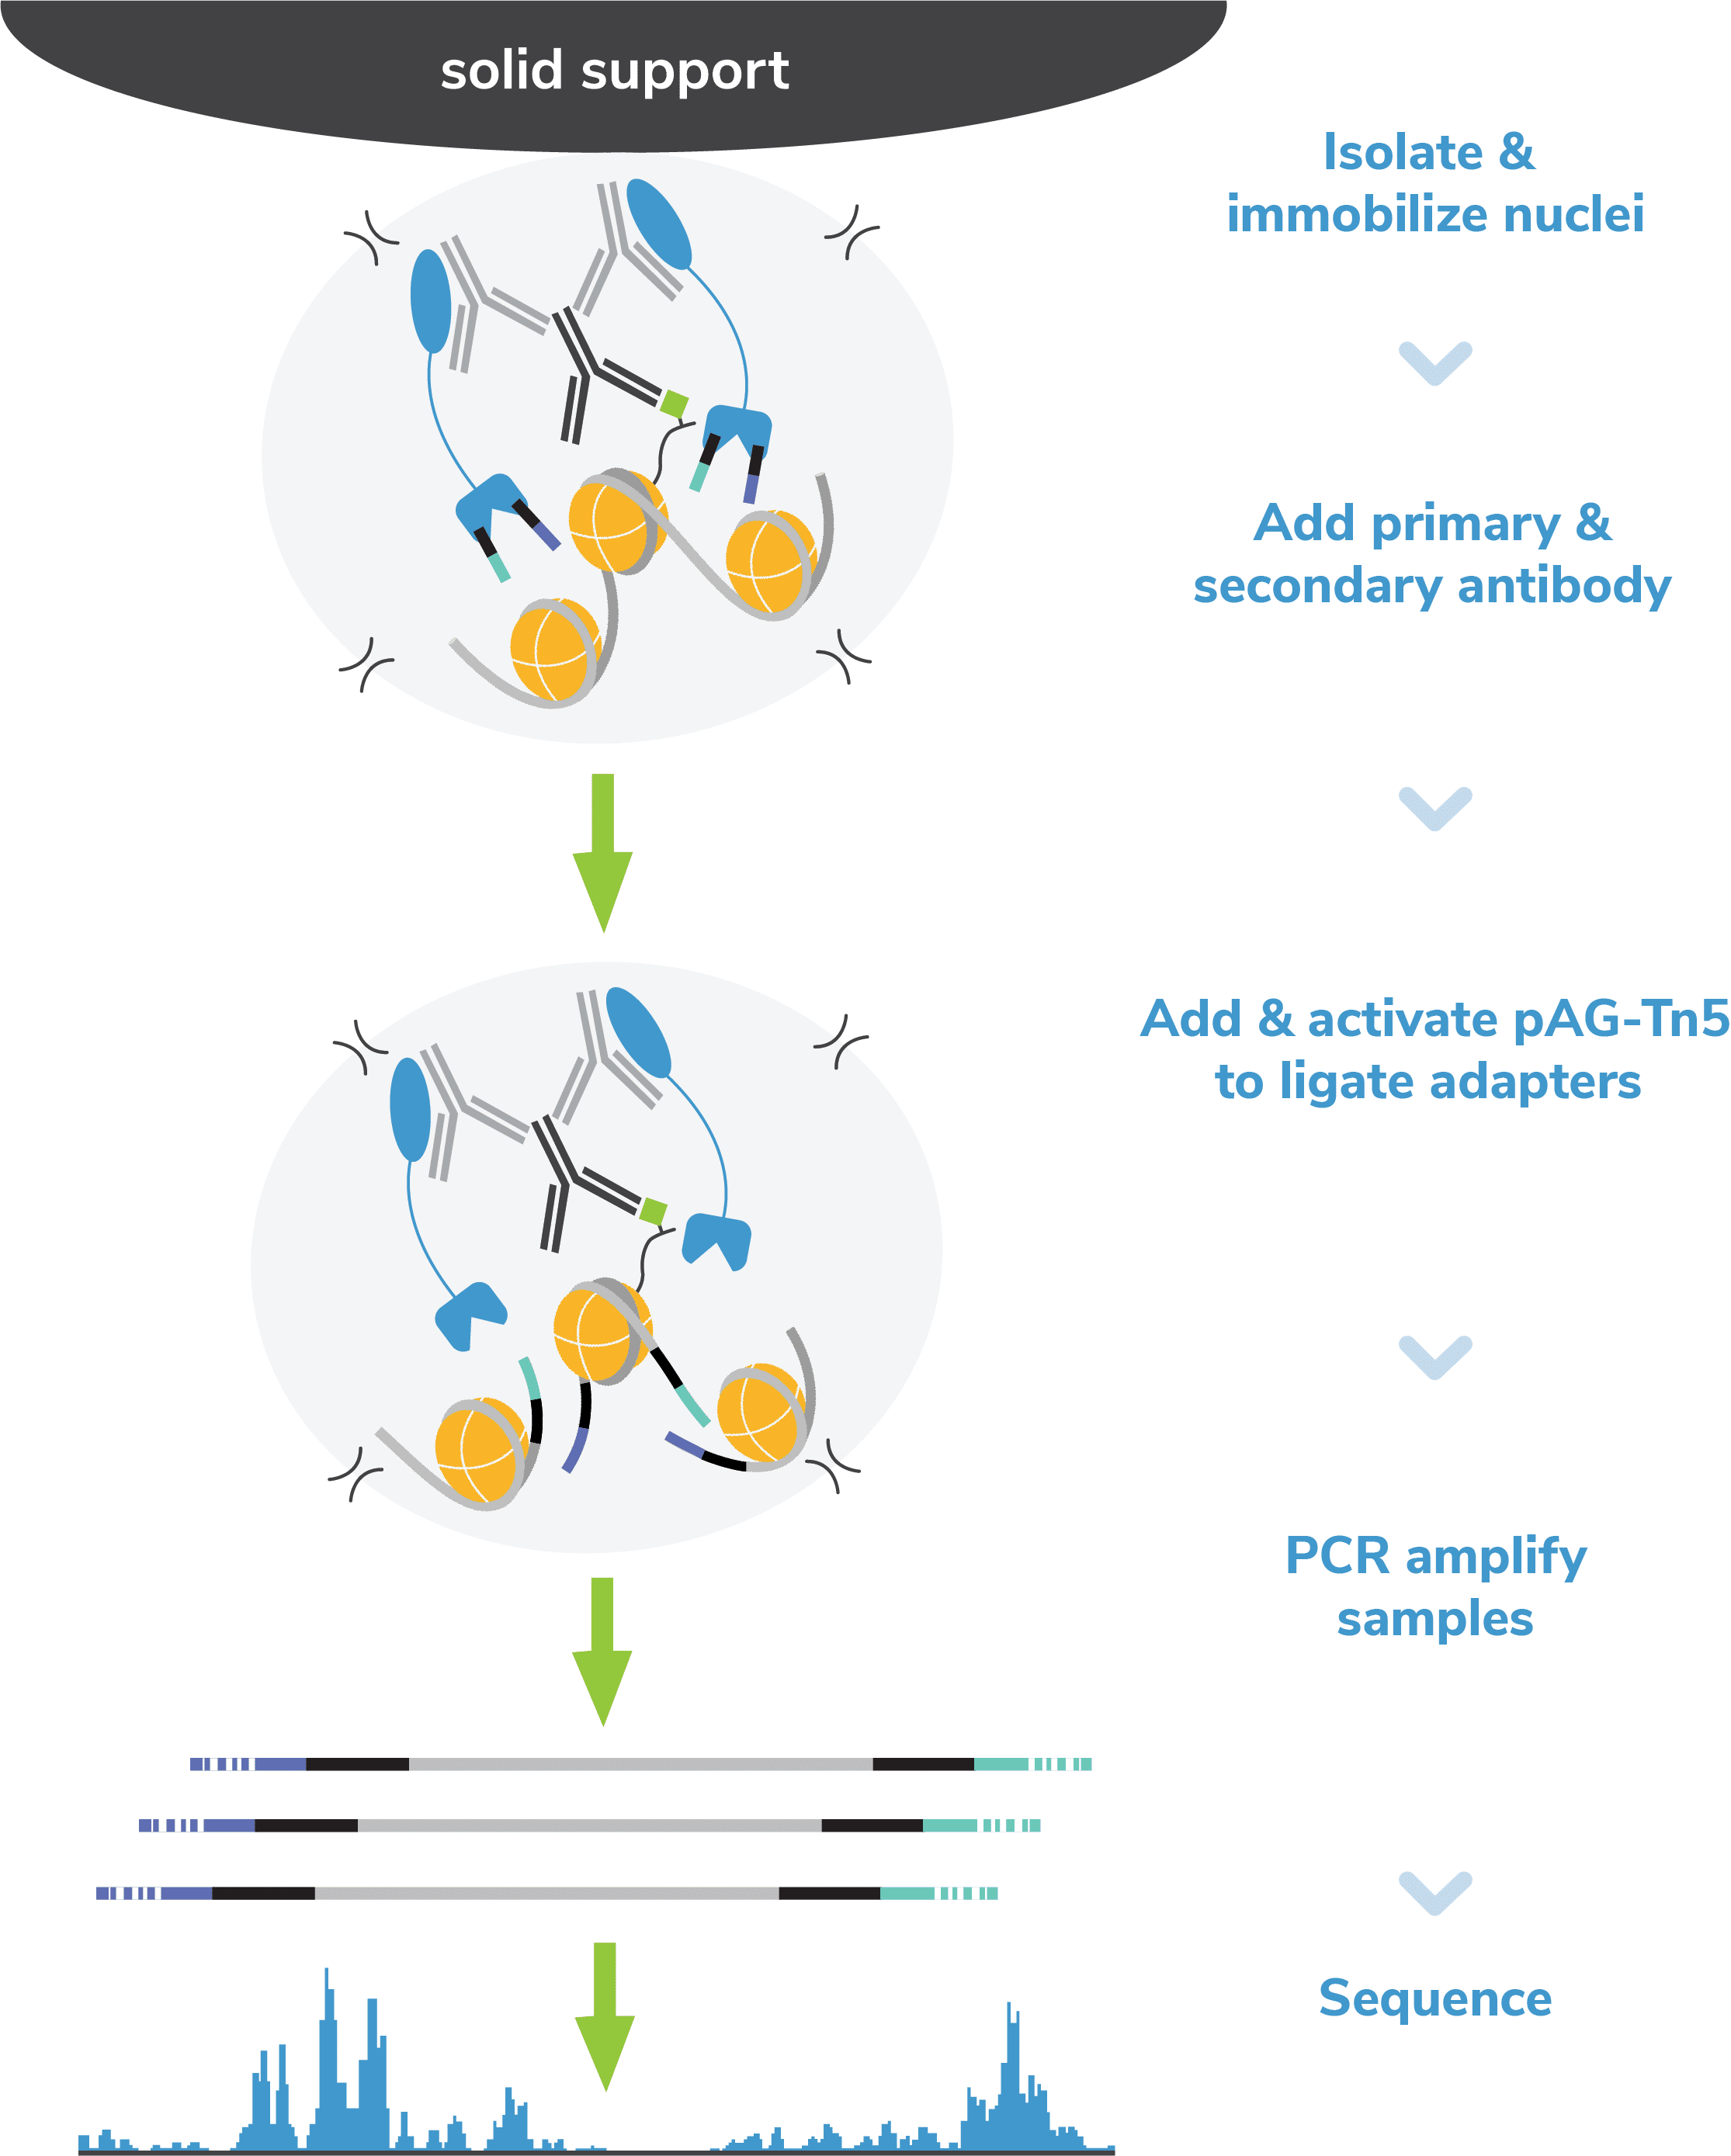
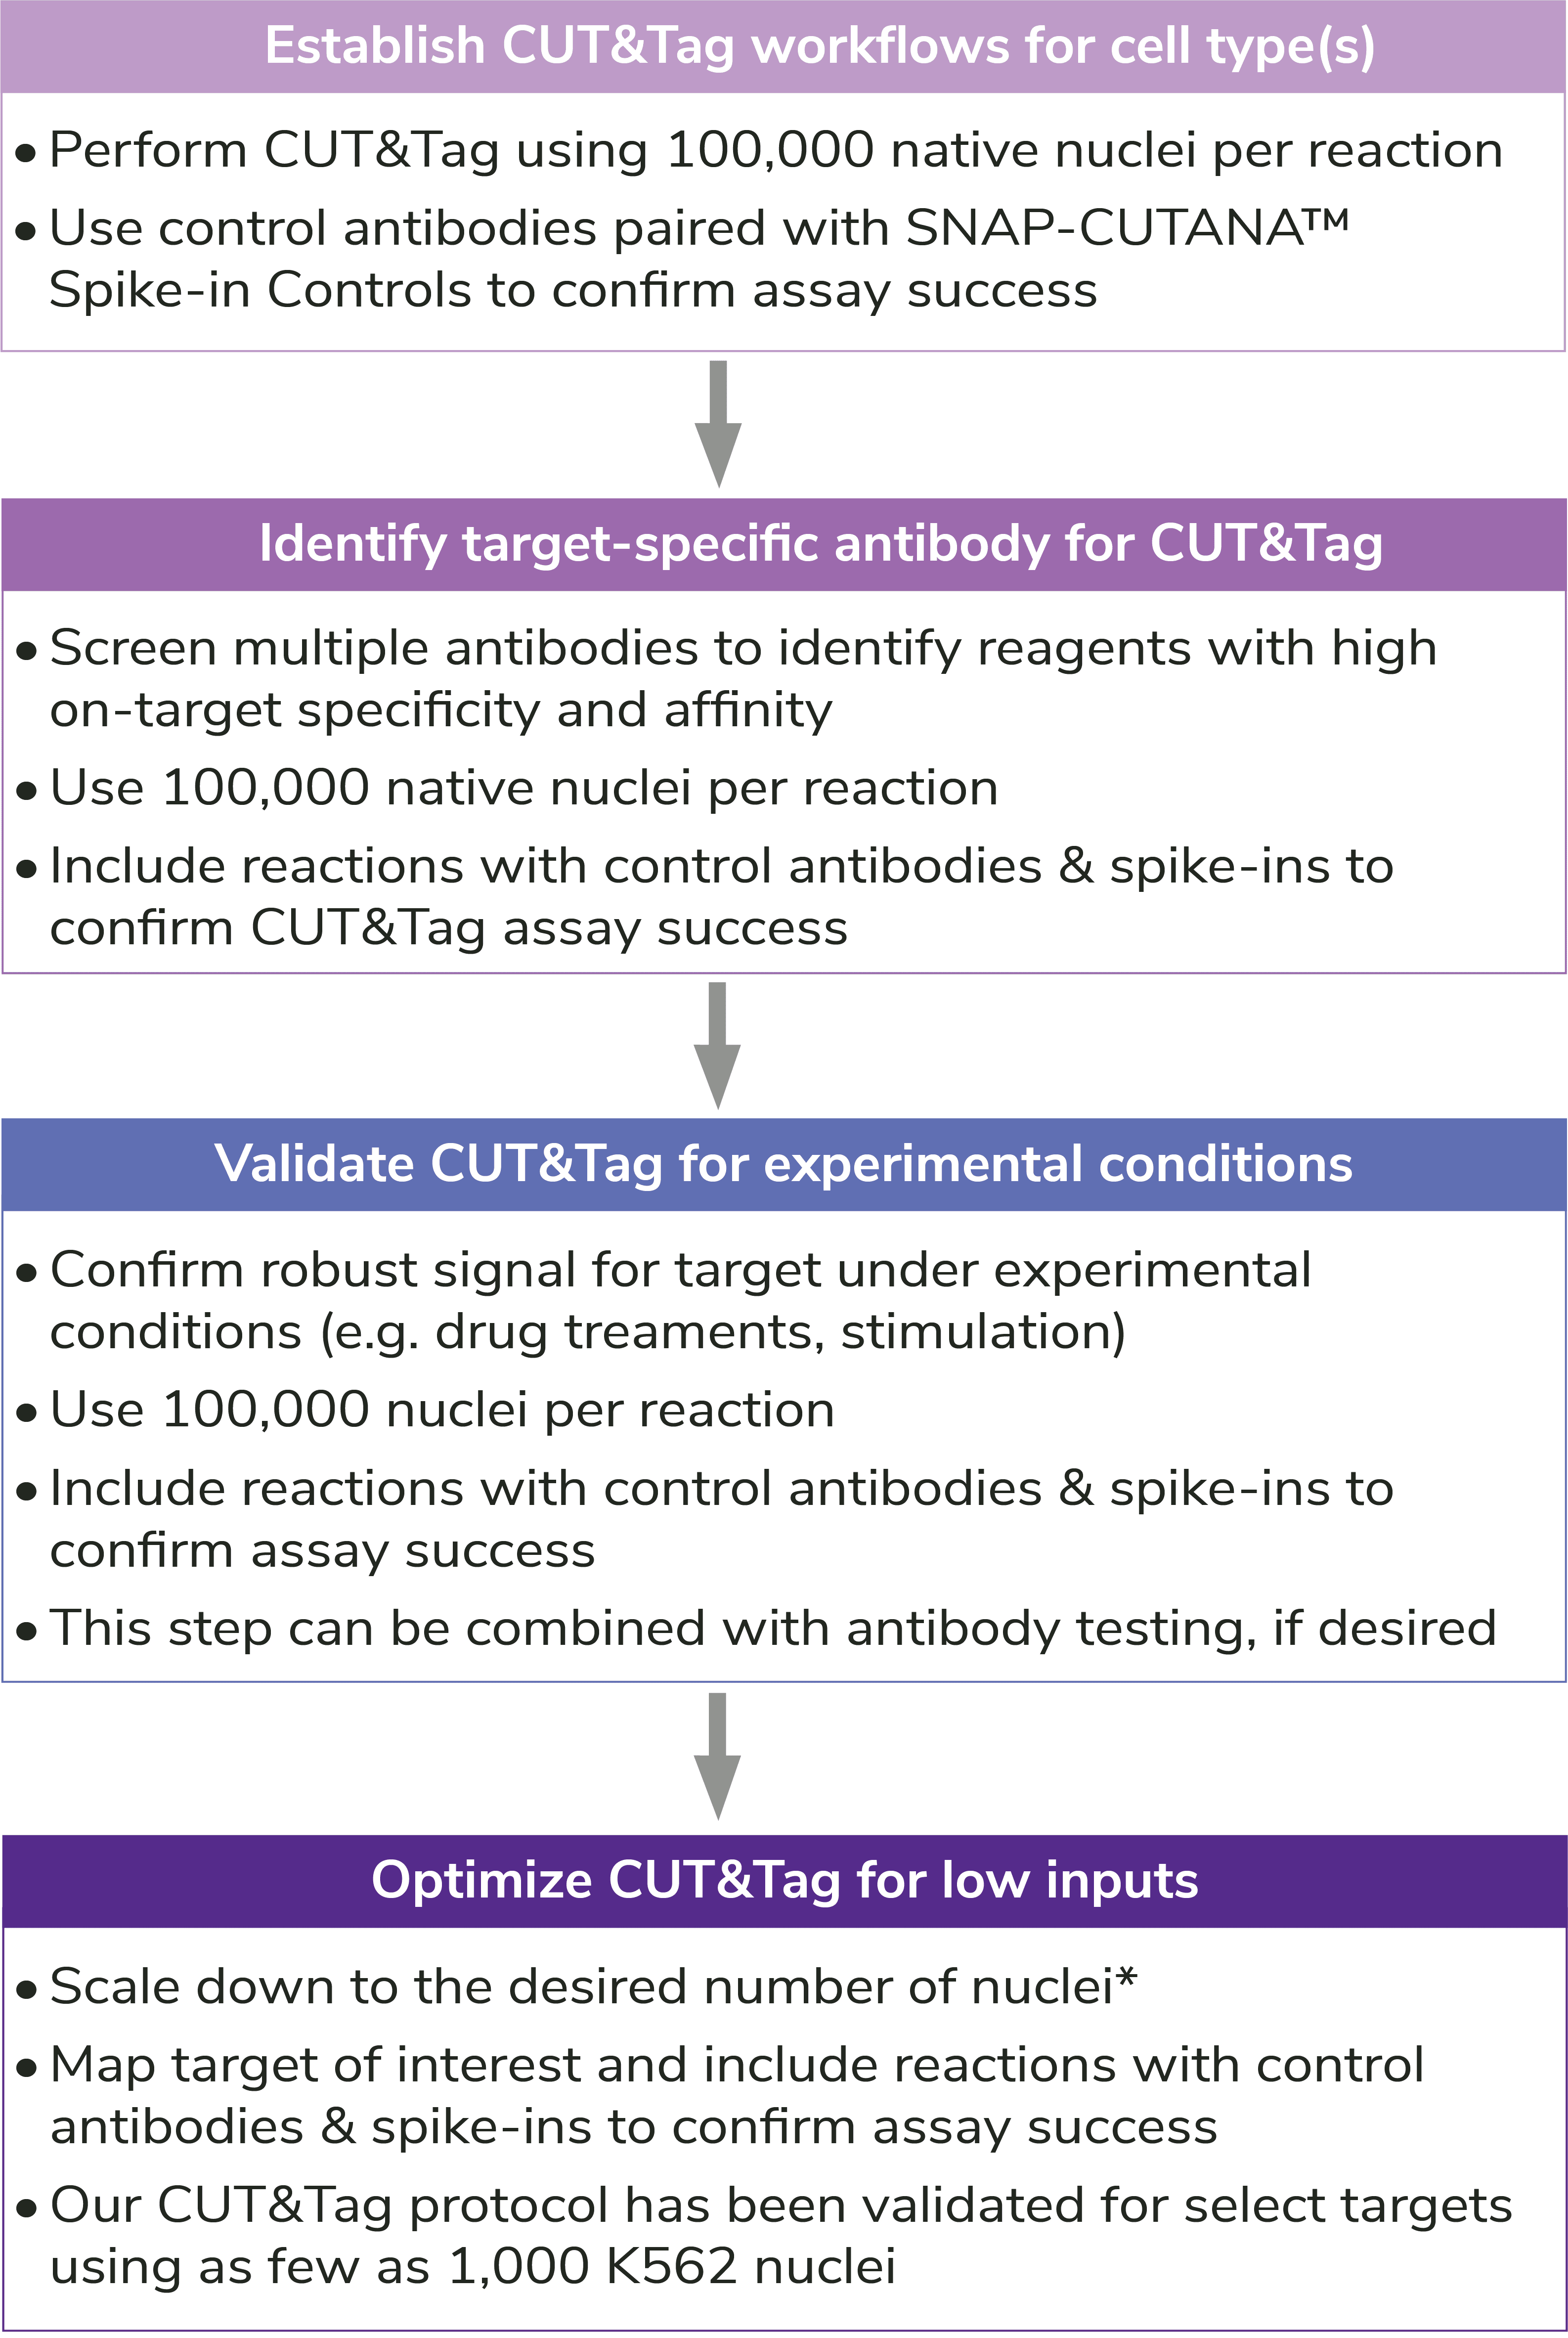
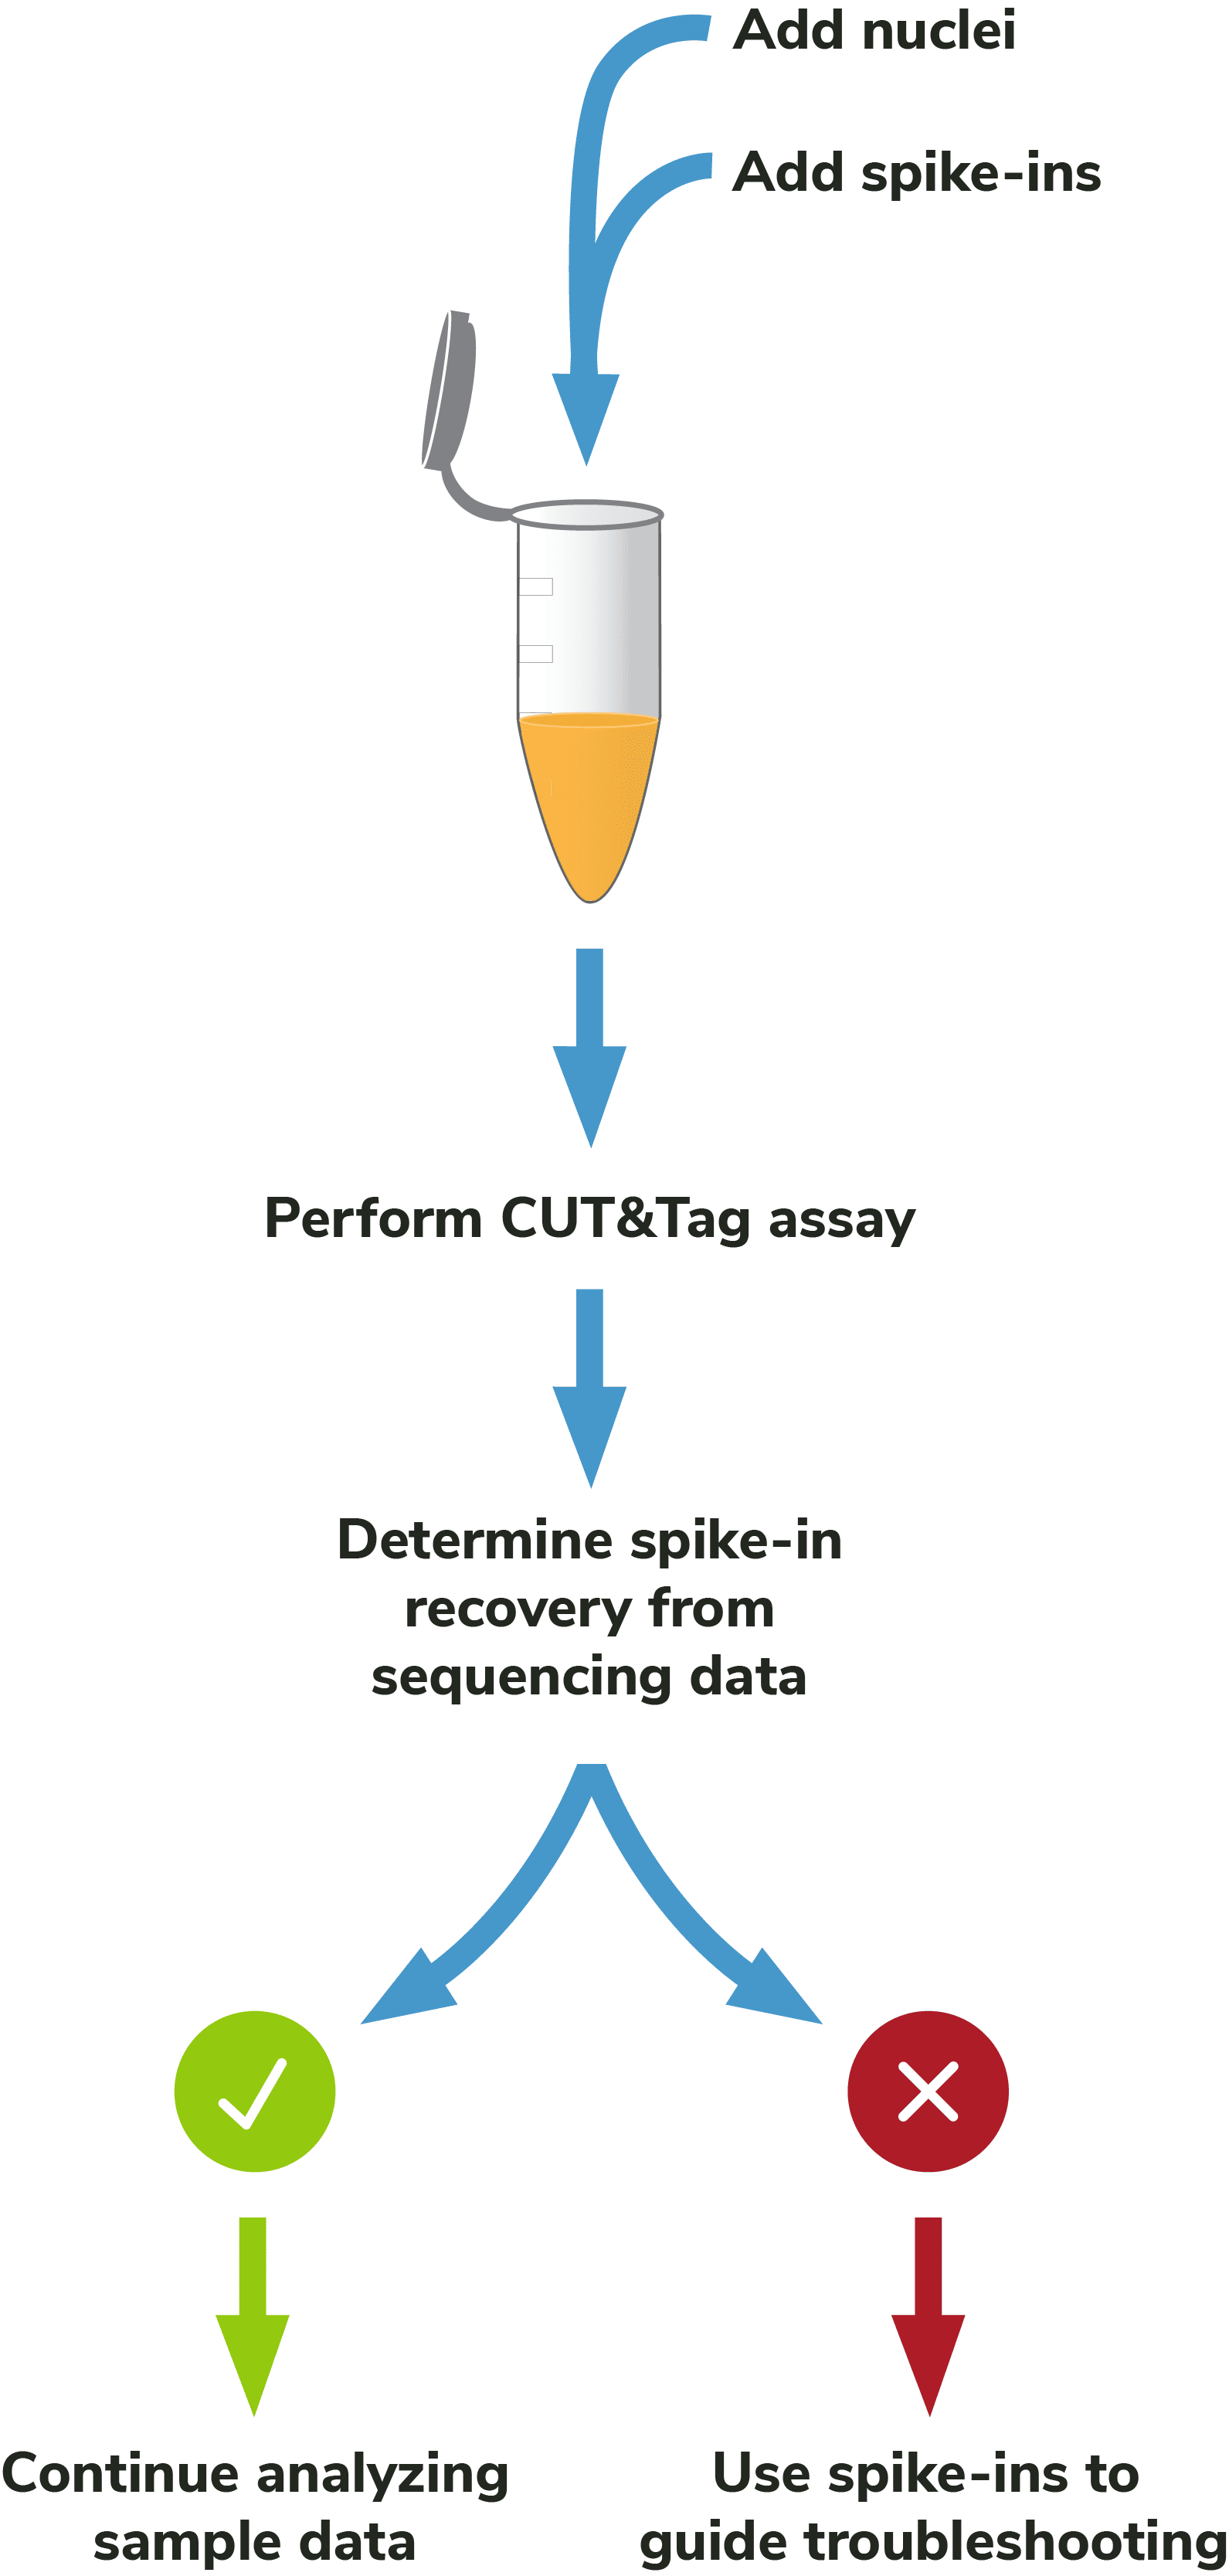
Figure 2: Outline of the CUTANA™ CUT&Tag workflow.
Step 3: Incubate with a species-specific secondary antibody.
The following day, reactions are washed and labelled with a species-matched secondary antibody (e.g. anti-rabbit, anti-mouse), which amplifies pAG-Tn5 localization and subsequent on-target signal in sequencing data. At the end of this step, reactions are washed with a high-salt buffer to remove unbound antibodies and prepare for tagmentation.
CRITICAL STEP: The high-salt wash is essential to minimize nonspecific binding of pAG-Tn5 to accessible DNA, which results in ATAC-seq like signal in CUT&Tag datasets7.
Important notes: The cell-bead mixture often becomes clumpy after overnight incubation at 4’C, but can be dispersed by gentle pipetting.
Step 4: Incubate with pAG-Tn5.
pAG-Tn5, pre-loaded with sequencing adapters, is added to each reaction and binds antibody-labeled chromatin via the immunoglobulin binding properties of pAG (Figure 2). Following incubation, the reactions are washed several times using a high-salt buffer to remove nonspecific pAG-Tn5.
Step 5: pAG-Tn5 activation and targeted tagmentation
Tn5 is activated by addition of magnesium to cleave and ligate sequencing adapters proximal to antibody-bound DNA (i.e. tagmentation). To help prevent nonspecific Tn5 cleavage in open chromatin, tagmentation is performed under high salt concentrations.
Tagmentation is quenched using a buffer containing EDTA, and DNA fragments are released into solution by heated digestion in a SDS buffer. SDS is subsequently neutralized using a nonionic detergent (i.e. Triton-X 100).
CRITICAL STEP: SDS inhibits indexing PCR – be sure to quench SDS activity!
Step 6: Indexing PCR
In EpiCypher’s exclusive Direct-to-PCR CUT&Tag Protocol, indexing PCR is performed directly on digested chromatin from Step 5 to generate NGS libraries (see note). The indexing primers anneal to ligated adapter sequences, ensuring selective amplification of tagmented DNA – even in the presence of cell debris. PCR parameters are specifically optimized for mononucleosome-sized fragments, and primers contain barcodes (or indexes) to enable multiplexed sequencing. This strategy allows you to go from cells to PCR amplified sequencing libraries in a single tube, minimizing sample loss and streamlining library prep.
Important note: The ConA beads are not removed and there is no DNA purification step prior to PCR. The number of PCR cycles may require optimization; see How to Design and Optimize CUT&Tag Assays.
Step 7: Library cleanup and quality analysis
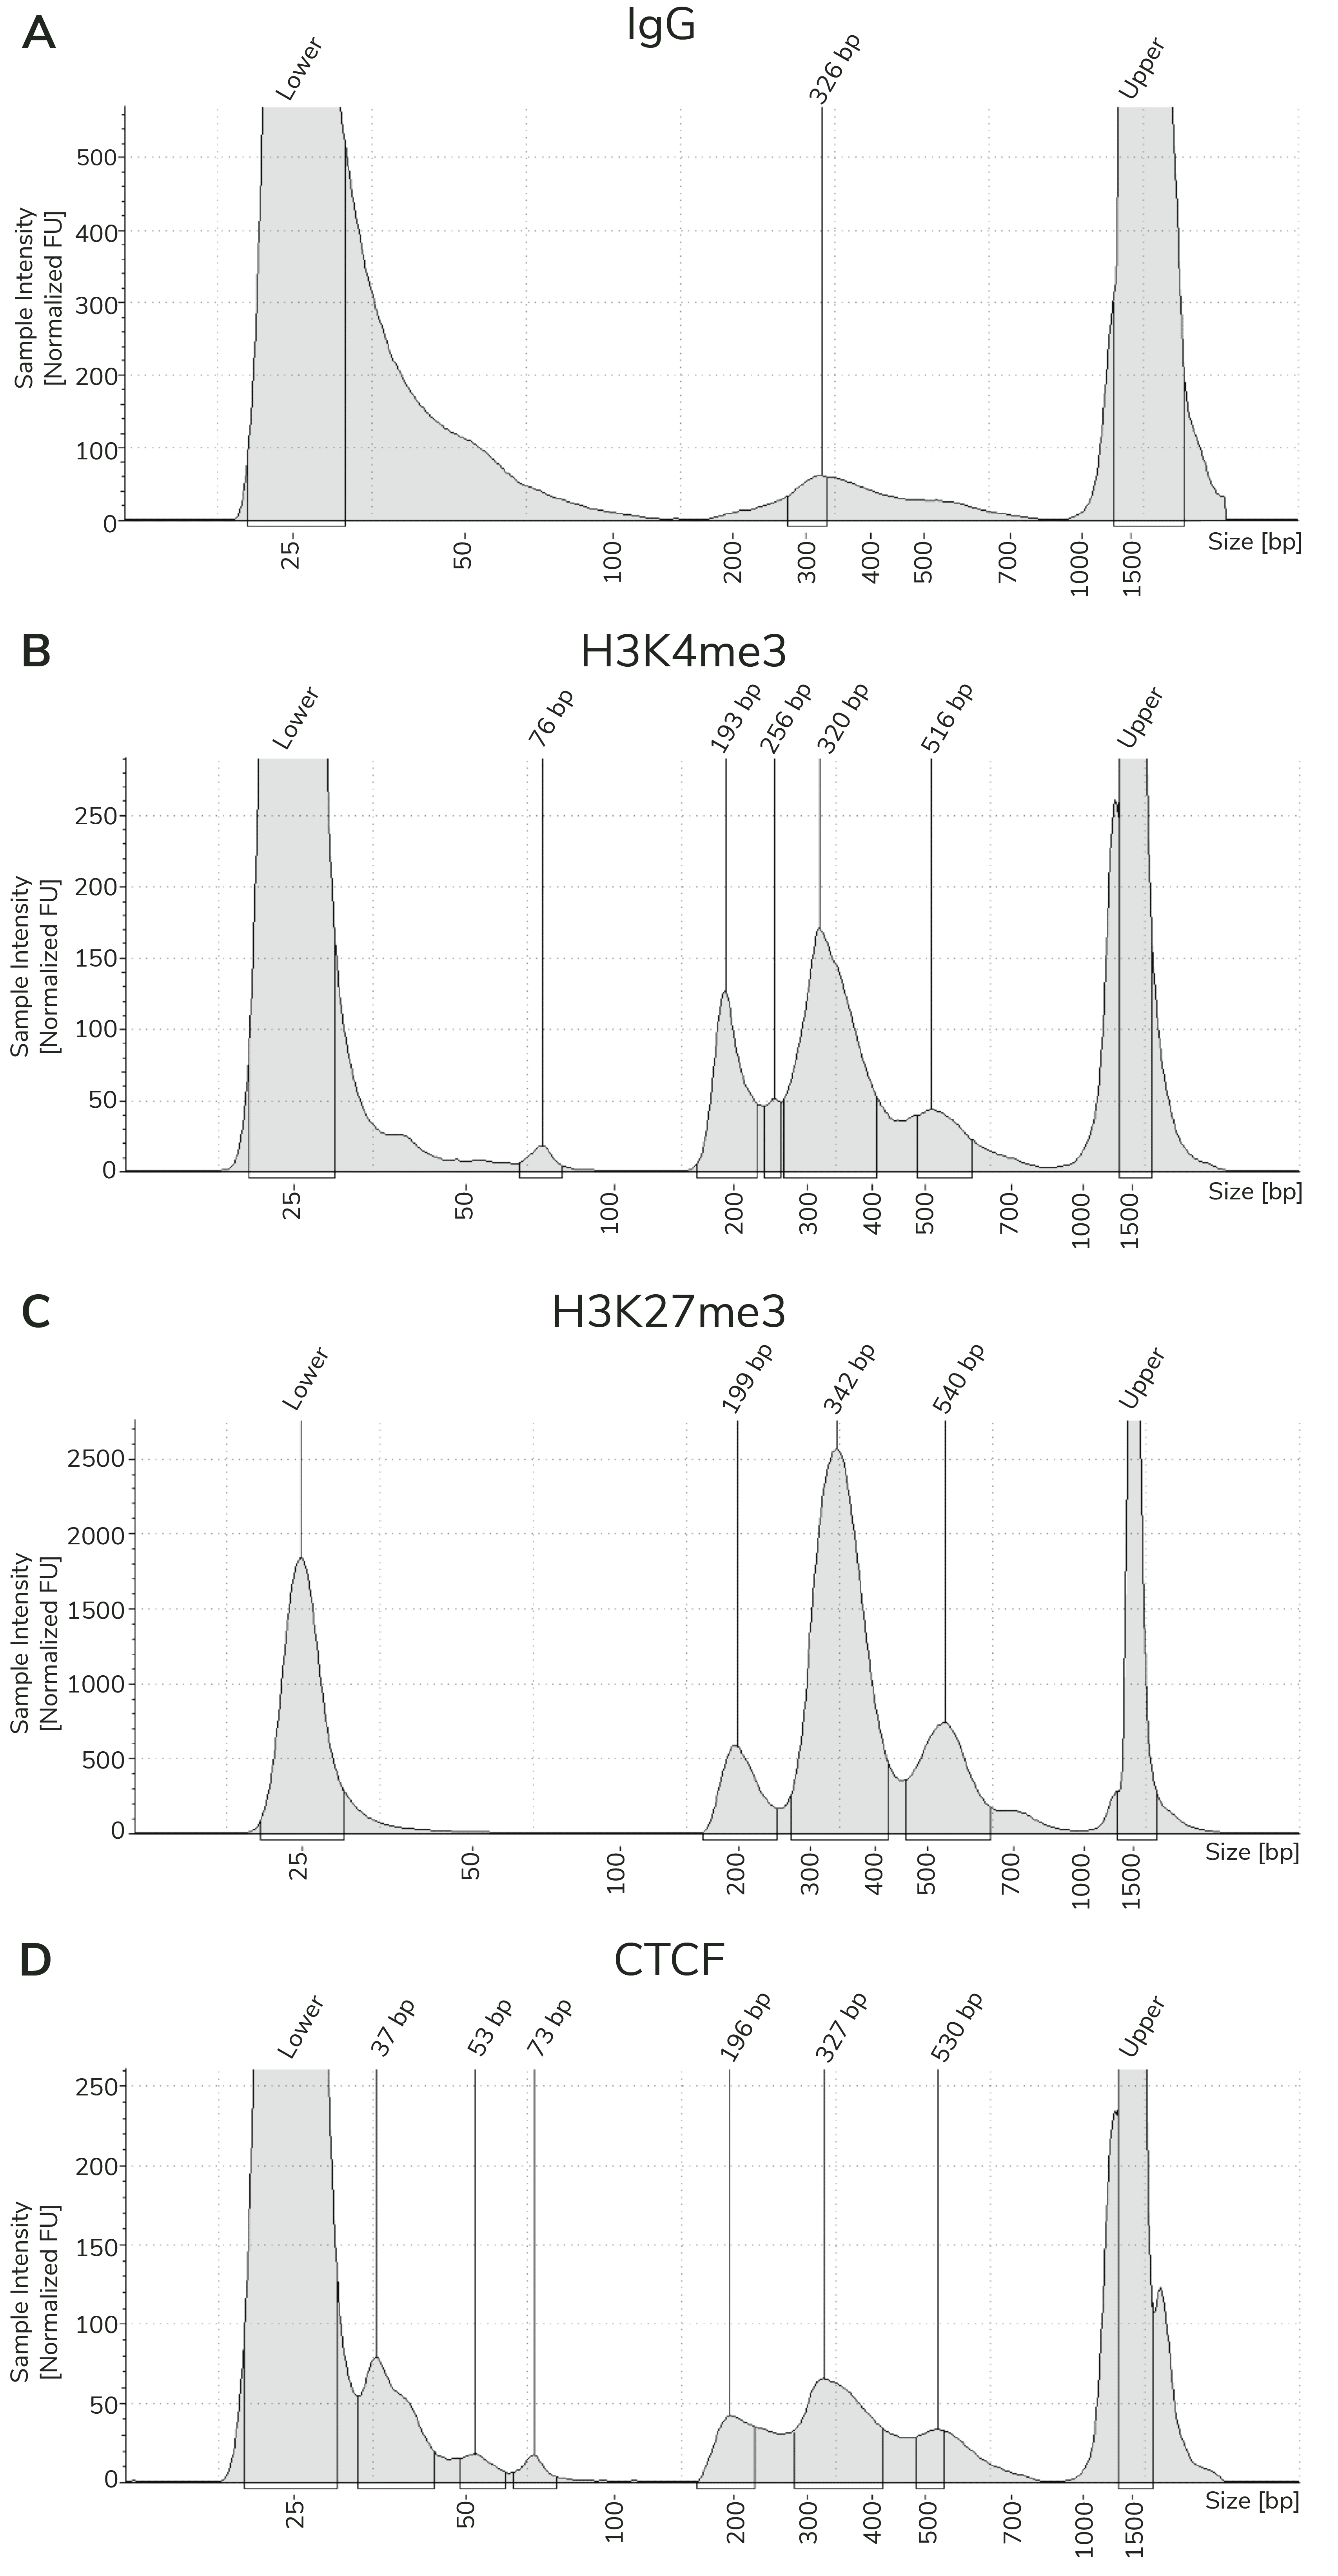
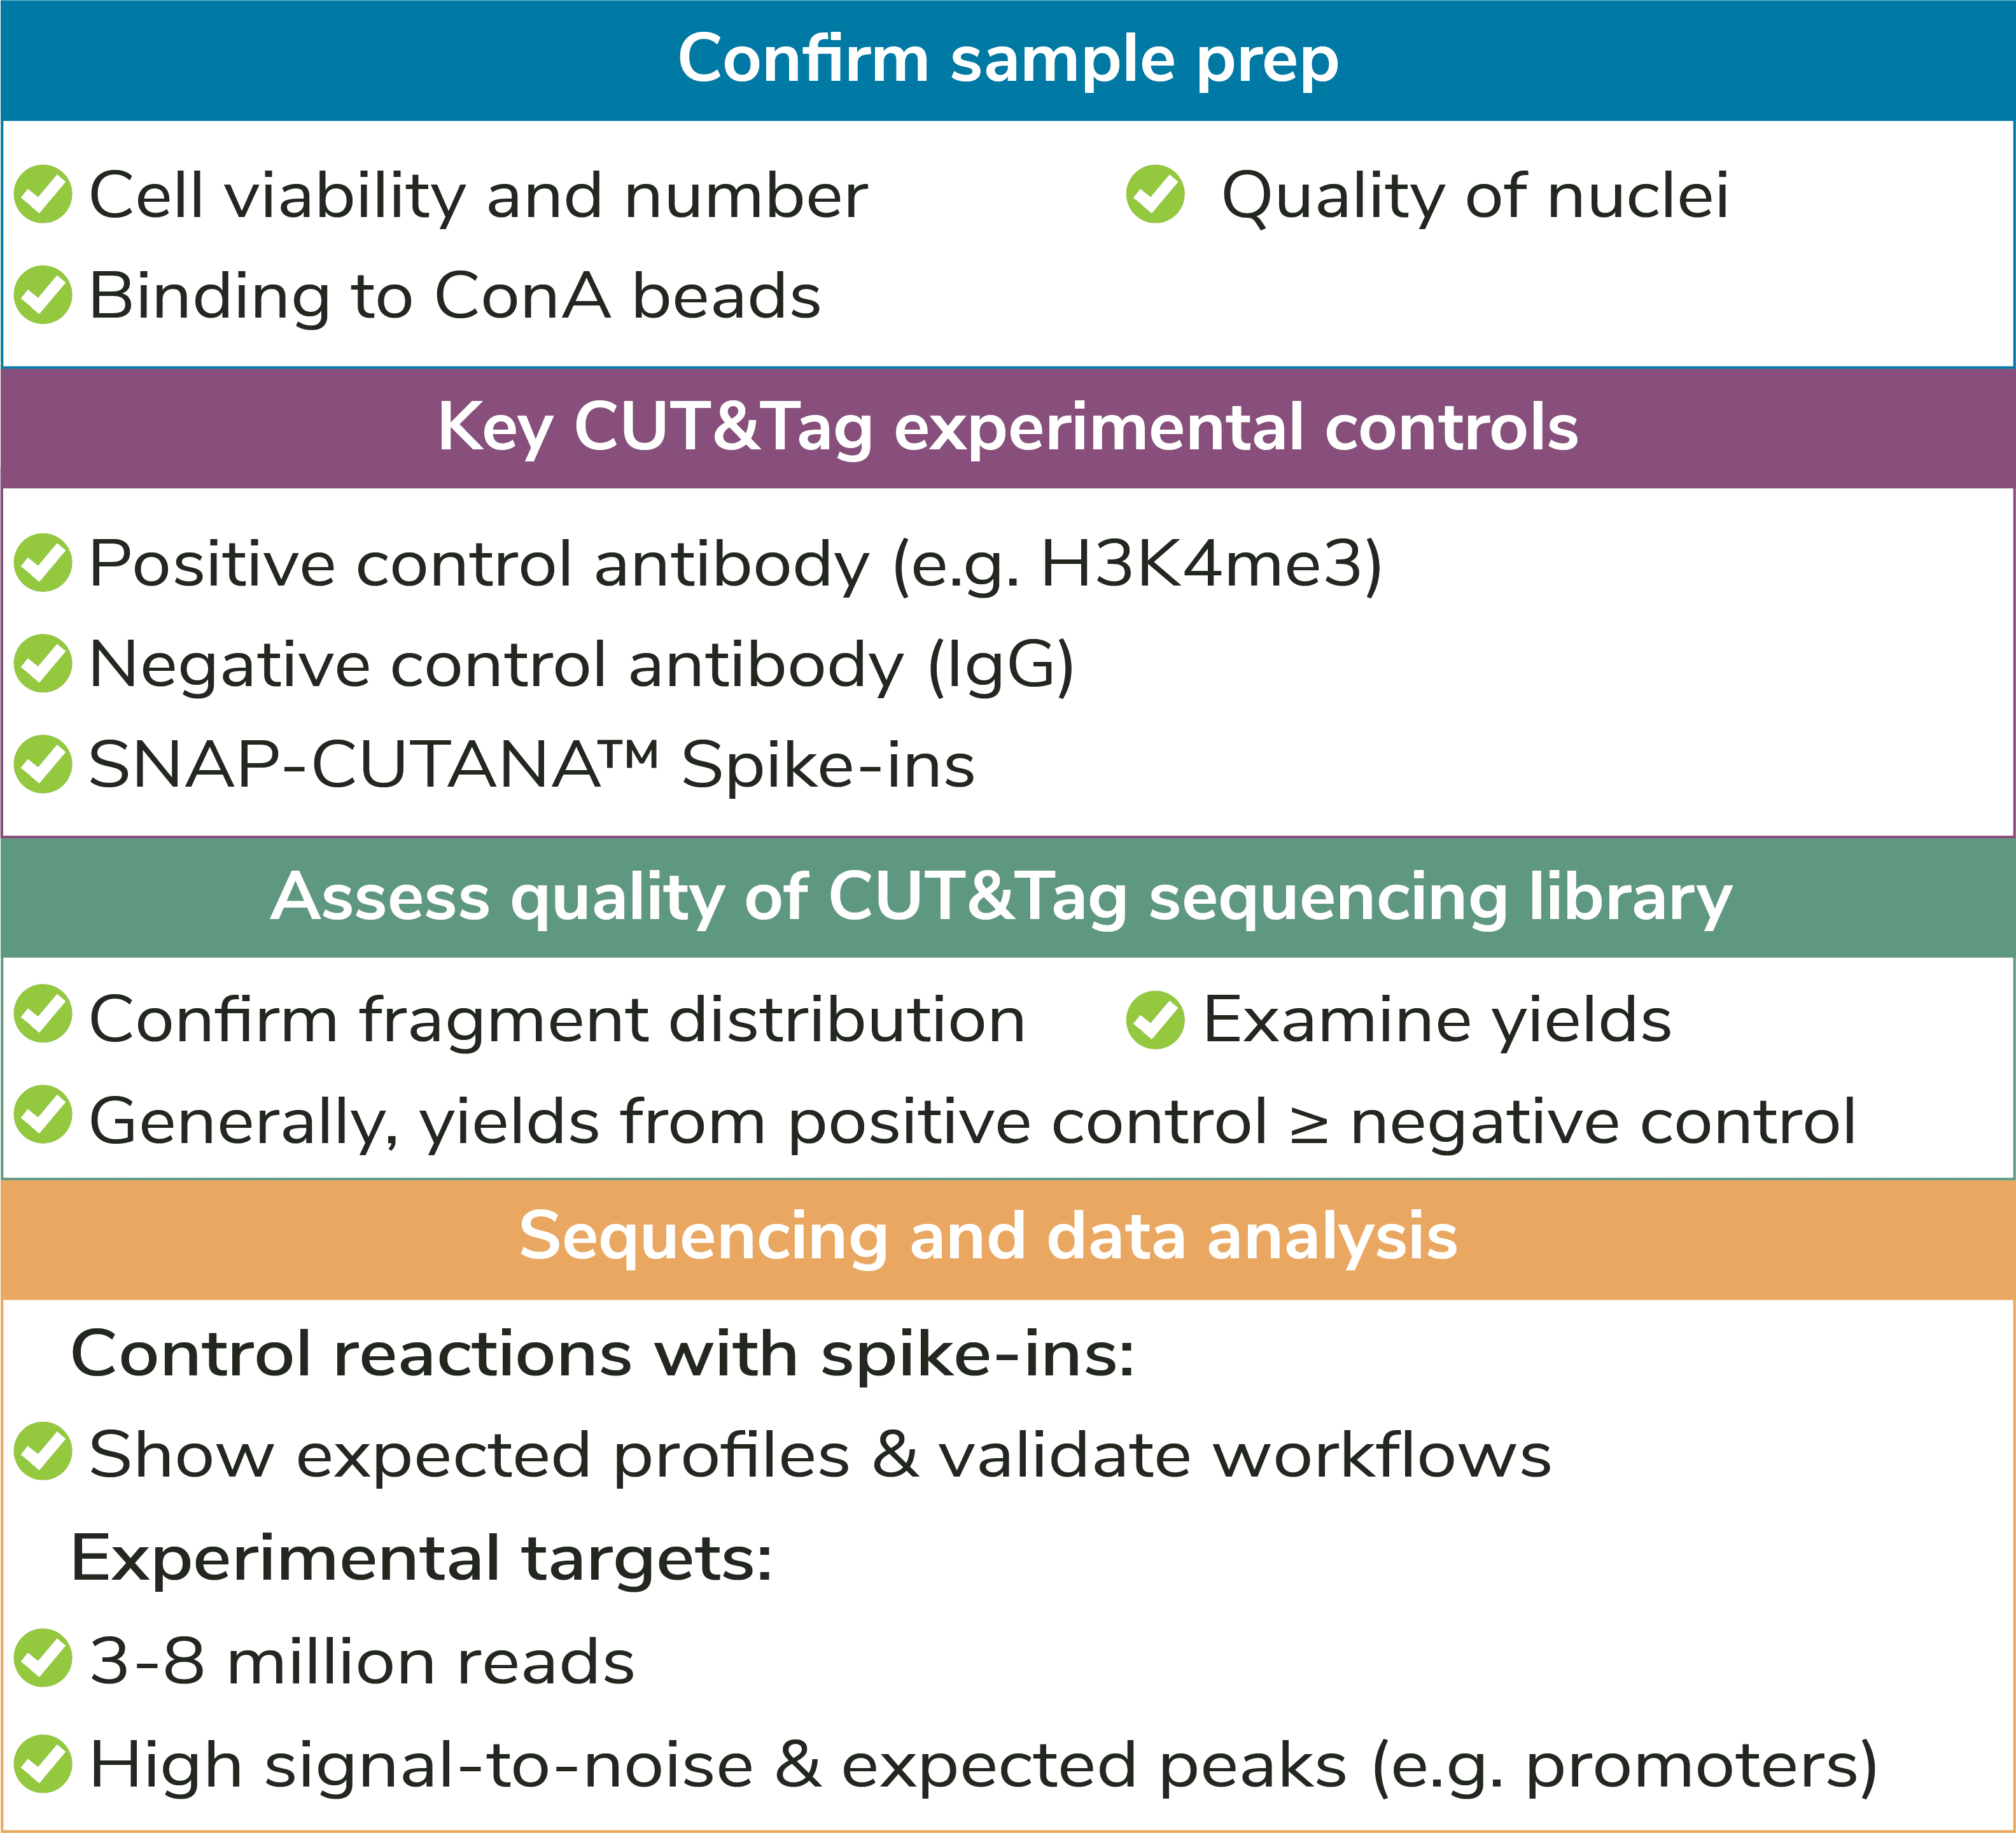
CUT&Tag sequencing libraries are purified using SPRI magnetic beads. Library concentration is determined using a fluorometric assay (e.g. ThermoFisher Qubit™) and fragment size distribution is examined by capillary electrophoresis (e.g. Agilent Bioanalyzer® or TapeStation®). The PCR parameters in this protocol amplify fragments compatible with Illumina® paired-end sequencing, with an average fragment size of ~300 bp (~170 bp nucleosome + sequencing adapters; Figure 3). When comparing library yields and distribution from CUTANA™ CUT&Tag assays, keep the following points in mind:
- The BEST indicator of CUT&Tag experimental success prior to sequencing is predominant enrichment of mononucleosome-sized fragments (~300 bp) in Bioanalyzer or TapeStation traces (Figure 3).
- Library yields should NOT be used as a definitive metric of success, since results vary by cell type, target abundance, antibody specificity, number of nuclei, and so forth. Instead, EpiCypher recommends aiming for ~30 ng total DNA, which allows accurate library quantification, minimizes PCR duplicates, and enables library pooling at standard concentrations.

